Autumn has finished, it clung on with its stunning colours and warm summerlike days, and finally succumbed to the dark cold depths of English Winter. However it is not all doom and gloom, Christmas is now near and this means LOTS of crafty things to be making, and yummy preserves to cook to get us through these winter months.
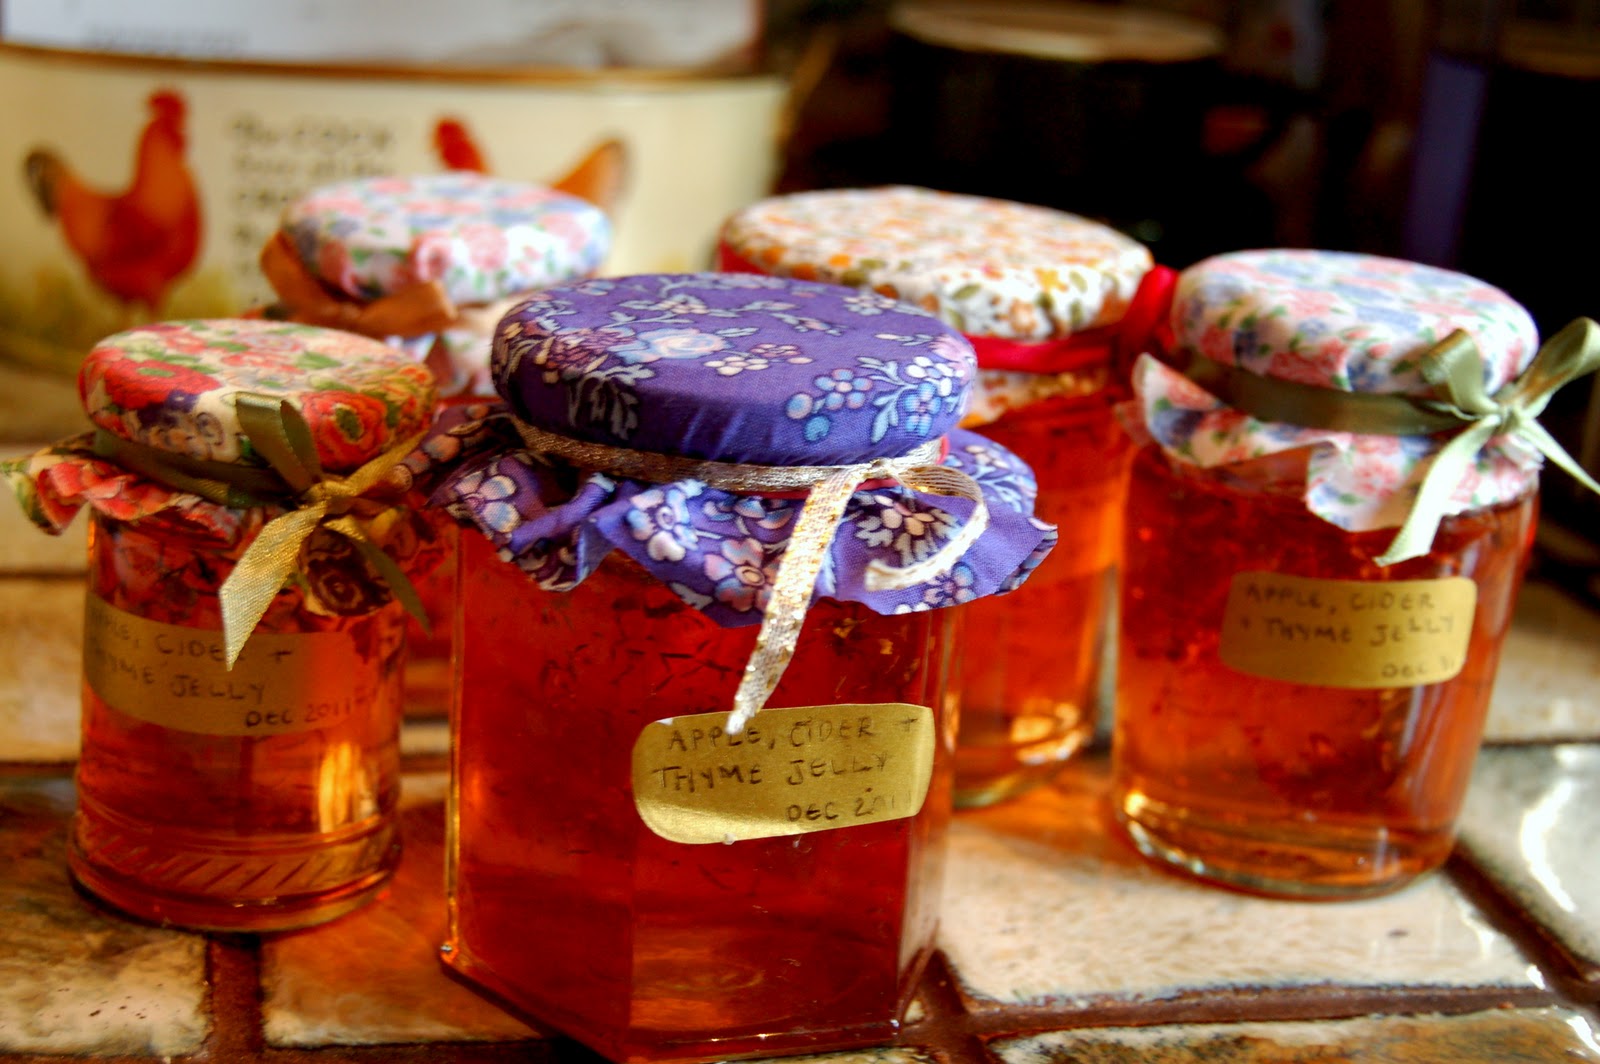
Yesterday I made some ‘Apple, Cider and Thyme Jelly’, which, as well as being pretty delicious, is a perfect gift to give to people as a thank you or a Christmas present.

Apple, Cider and Thyme Jelly
3lb. Apples
1 Pint Water
1 Pint Cider
2lb. White sugar
1 Lemon
Fresh Thyme
Dried Thyme
Wash the Fruit, peel and chop roughly and put in a cooking pan, along with a large handful of fresh Thyme. Add lemon and put enough water and cider to cover the fruit (The water and cider measurements are only estimates, if you would like to use more apples, then just add more water and cider accordingly, as long as it covers the fruit).
Bring to the boil, and simmer gently for one hour.
The fruit will then have assumed a pulp like consistency. Using a large bowl, a sieve, and some straining cloth, pour the liquid into the lined sieve and leave to drain naturally. It is important you do not force the juice out of the apple pulp as this will make the jelly cloudy.
Once all of the apple pulp has been drained (This can be used as apple sauce with roast pork) measure the juice, and for every pint of juice allow 1lb of sugar, put the juice and the sugar into the clean cooking pan and bring to the boil, gently stirring until the sugar is dissolved. Bring to the boil rapidly, the temperature should reach 224 Degrees F, or 106 degrees C. Test the jelly is at setting point by using the Wrinkle test.
Wrinkle test – Spoon out one teaspoonful of the preserve onto a cold plate and put aside in a cold place for a few minutes. If setting point has been reached, the surface will have set and will wrinkle when pushed gently with the finger.
When the setting point has been reached take the liquid off the heat and scrape off all of the white scum that has accumulated on the top (it is very important you do this as it will make the jelly cloudy).
Pour the liquid into the cleaned jars and sprinkle dried thyme on top (we also used fresh Thyme leaves) wait a few minutes until the jelly is nearly set and stir in the thyme with an upward scooping motion to create an even distribution. Put the lids on the jelly tightly to ensure a good seal.

After the jelly has been made it is time to label and decorate... Using some gold paper I had in my scrap box (an old birthday envelope) I wrote the name of the jelly and the date made. I then attached this to the jar using double sided sticky tape. As an extra added touch I then found my bag of cut offs from making bunting and using this beautiful bunting material I cut a circle about an inch bigger than the lid of the jar. Covering the lid I then secured this onto the jar with an elastic band, and used some pretty ribbon to cover the elastic band and create a cute bow.
Now these are ready to give away... what a pretty, easy, cheap present!!
The Vintage Bunting Company Xxxx
YUM!
ReplyDelete